You are currently browsing the tag archive for the ‘baby crafts’ tag.
I can’t believe it’s been so long since I was here. For a while, of course there was no point. No crafting was being made, and even the cooking was of the “what can I make in under 25 min. before we all starve to death?” kind. Come to think of it, that would have been very blog-worthy, had I had the time to write about that!
In any case, crafting has slowly resumed, and I can’t think of a better way to keep track of it for future reference than entering all here. So, let’s see, what have I done lately? In no particular order, and with minimal detail for now:
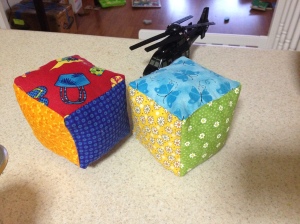
Fabric cubes, stuffed with polyfill. They were received with enthusiasm but soon ignored. It was fun to make, though, and a quick project for instant gratification.
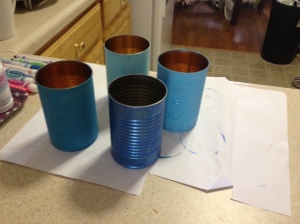
Recycled tin cans, painted with acrylic paint and later on decorated with more color (sorry, no photos of final product.) They are very useful for storing pens, markers, crayons etc. Also quick and easy, plus I feel better about reusing something that would otherwise end up in the recycling bin.
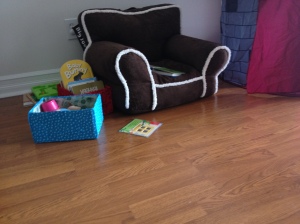
See the two boxes next to the armchair? They are cardboard boxes covered with fabric, and they have been my biggest hit so far. The boys love to run around with them, and great for storing books and toys. For this size, all it takes is less than a fat quarter and a little glue. I am already planning making more for the crafts room and other areas in the house. And, of course, another great recycling project!

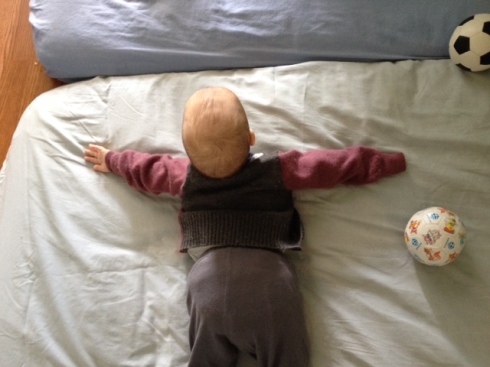
The weather is getting cooler, just a little bit each day. The light is this beautiful diffused brightness that turns everything golden, and the trees whisper the husky song of drying leaves. It was time for new cardigans for the boys!
I have been waiting for the chance to make the kimono-style cardigans with long sleeves, especially as it seems to be quite difficult to find long sleeved sweaters for babies. I used a shirt that fits well for sizing, and two sweaters from my robust stash of sweaters for repurposing. I used one of daddy’s old grey ones (he has many), and a purple one that used to be my aunt’s. I made the sleeves extra long, to ensure they last this winter, and I am very pleased with how they fit the boys. I still have to add bias tape to prevent fraying, so although I let them wear their new cardigans on Saturday, I don’t consider them done. I make my own bias tape, which I find quite time consuming, perhaps because I haven’t done it enough to find all the shortcuts.
If you want to make your own (the pattern is actually so basic and simple, it could work for any size, up to an adult cardigan – think of those nice ballerina wrap around tops!) there are lots of tutorials out there, like this one, this one, or this one. I actually winged it, after having made the pattern a couple of times before. For closure, I am planning to sew snaps in strategic places, instead of trying to fumble with strings on wriggly babies.
I am terrible with going to the post office. There is no good alternative in my area, I always feel they are going to be rude and annoying (which they often are, but not always to be fair), and it usually requires an extra trip just for that. Unlike most people, I don’t begrudge the wait – I have long ago made my peace with waiting in lines and I just take the opportunity to people-watch, day dream, and look around for inspiration. There is always inspiration, if you give yourself time to let it rise in your mind, so waiting in lines is the perfect time pocket for doing just that.
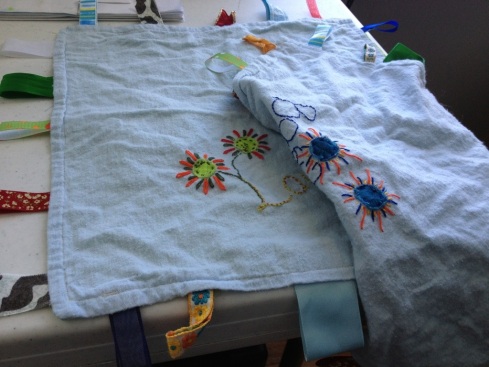
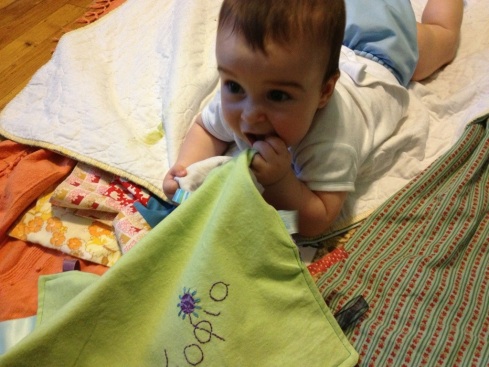
The reason I mention post offices is that I have to go to one, as I have 4 packages with gifts for people that I haven’t mailed to them in weeks (okay, months… *blush*) One of them contains a tag blanket for my lovely niece, who turned 1 in August. She was my original inspiration, as my brother mentioned that she likes to stick the tags from toys in her mouth, and so do my boys. A light went on in my head, and I understood the purpose of tag blankets. I had seen them, and tutorials for how to make them, online, but always thought they ‘d be kind of a boring thing to have around. Obviously, I have a long way to go before I think like a baby. The boys looooove theirs, and enjoyed being the product quality control team for the first one I made (see photo above.) They grab the tags, stick them in their mouths, they play with the applique, and V plays his favorite game, which is to put the blanket on his face for a few seconds and then lift it up – is it a form of κου-κου τζα (peekaboo) or does he get something else out of it? I so wish I knew! Maybe I should try playing the game myself 🙂
There are several tutorials online for how to make them, which were very useful in some respects, but of course I did mine a little differently, to suit my preferred way to work / fabric selection etc. I used solid-color flannel for the soft side, and an equal size cotton fabric (from fat quarters) for the other side, plus a little more for the matching applique. For the tags, I used my stash of ribbon from gift wrapping and ribbon (my mother would be proud of me for holding on to them all these years!) A word of caution: if your gift ribbon is “wired” to help the bows hold their shape, make sure to pull that wire out before attaching to the blanket.
The process itself was very easy and fun:
- Cut two pieces of fabric at a square of your choice, estimate how many tags you ‘d want for each side, and cut as many in equal sizes. You can embroider, applique, use patchwork pieces or use whatever other embellishments you like for the fabric pieces.
- Fold tags in half, and pin on the right side of one of the two fabrics, tags’ folded end facing the center of the fabric, and edges sticking out just a little bit from the fabric edge.
- Lay the other piece of fabric on top (right sides facing each other with tags in between them) and sew all around, leaving an opening for turning inside out.
- Turn inside out carefully (lots of pins inside!), remove all pins, and top stitch all around to close opening and give a finished look to the blanket.
I washed mine a couple of times before giving it to the boys, to make sure all the colors and other nasty stuff from the tags were washed away.
Enjoy!
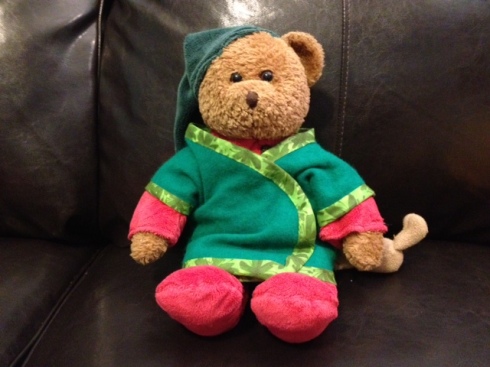
After their bath, the boys morph into elves, thanks to these baby hats I made for them. I traced another hat we found in their pile of cousin hand-me-downs, and made a simple pattern for it. This one is made with the knit cotton fabric of an old pajama of mine, and I really like the way it looks. As their heads grow, I plan to adjust the size and make more for them- until they are old enough to say “enough, mama!”
I have the secret hope they won’t be in a hurry to say it!
It is cold out there! So I dug into my stash of sweaters for recycling, and picked a nice green one, perfect for some baby cardigans. I used this tutorial and included pattern for the kimono, and a version of this for the bias tape. Cutting the pieces and putting together the wool part was quick and easy, but I am not very good at bias tape making, and it took 3 times as long. It was fun, though, and I enjoyed making things that should fit but without the need for them to fit perfectly. I learned a couple of new techniques in this project, which is always a plus. Now I need to make another one! I have the wool part already cut, so all I need is another color for the trim and, hopefully, an improved performance in making and attaching it.
Some details about the bias tape: I used a fat quarter and cut strips of about 2″ wide, and that made almost 6 yards of bias tape (a great deal!) The tool I had bought to fold the tape, however, did not work well at all for me, so I did the whole thing by hand (hence the time-consuming element). Perhaps I should design a bias tape making tool first!

