You are currently browsing the category archive for the ‘embroidery’ category.
I am terrible with going to the post office. There is no good alternative in my area, I always feel they are going to be rude and annoying (which they often are, but not always to be fair), and it usually requires an extra trip just for that. Unlike most people, I don’t begrudge the wait – I have long ago made my peace with waiting in lines and I just take the opportunity to people-watch, day dream, and look around for inspiration. There is always inspiration, if you give yourself time to let it rise in your mind, so waiting in lines is the perfect time pocket for doing just that.
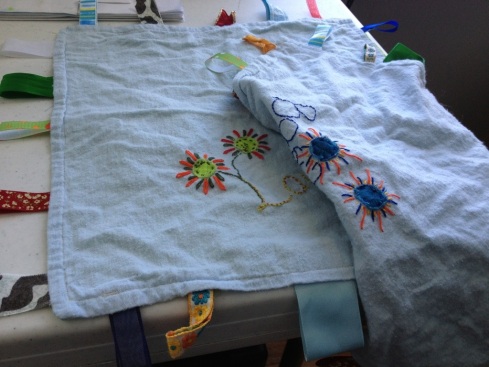
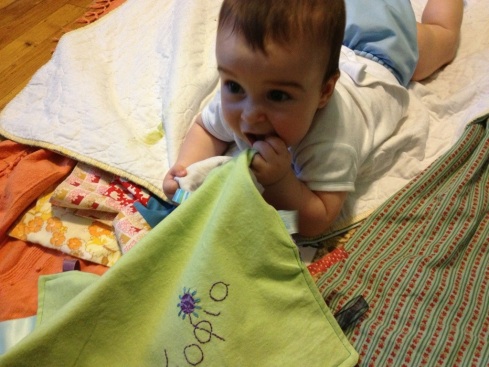
The reason I mention post offices is that I have to go to one, as I have 4 packages with gifts for people that I haven’t mailed to them in weeks (okay, months… *blush*) One of them contains a tag blanket for my lovely niece, who turned 1 in August. She was my original inspiration, as my brother mentioned that she likes to stick the tags from toys in her mouth, and so do my boys. A light went on in my head, and I understood the purpose of tag blankets. I had seen them, and tutorials for how to make them, online, but always thought they ‘d be kind of a boring thing to have around. Obviously, I have a long way to go before I think like a baby. The boys looooove theirs, and enjoyed being the product quality control team for the first one I made (see photo above.) They grab the tags, stick them in their mouths, they play with the applique, and V plays his favorite game, which is to put the blanket on his face for a few seconds and then lift it up – is it a form of κου-κου τζα (peekaboo) or does he get something else out of it? I so wish I knew! Maybe I should try playing the game myself 🙂
There are several tutorials online for how to make them, which were very useful in some respects, but of course I did mine a little differently, to suit my preferred way to work / fabric selection etc. I used solid-color flannel for the soft side, and an equal size cotton fabric (from fat quarters) for the other side, plus a little more for the matching applique. For the tags, I used my stash of ribbon from gift wrapping and ribbon (my mother would be proud of me for holding on to them all these years!) A word of caution: if your gift ribbon is “wired” to help the bows hold their shape, make sure to pull that wire out before attaching to the blanket.
The process itself was very easy and fun:
- Cut two pieces of fabric at a square of your choice, estimate how many tags you ‘d want for each side, and cut as many in equal sizes. You can embroider, applique, use patchwork pieces or use whatever other embellishments you like for the fabric pieces.
- Fold tags in half, and pin on the right side of one of the two fabrics, tags’ folded end facing the center of the fabric, and edges sticking out just a little bit from the fabric edge.
- Lay the other piece of fabric on top (right sides facing each other with tags in between them) and sew all around, leaving an opening for turning inside out.
- Turn inside out carefully (lots of pins inside!), remove all pins, and top stitch all around to close opening and give a finished look to the blanket.
I washed mine a couple of times before giving it to the boys, to make sure all the colors and other nasty stuff from the tags were washed away.
Enjoy!
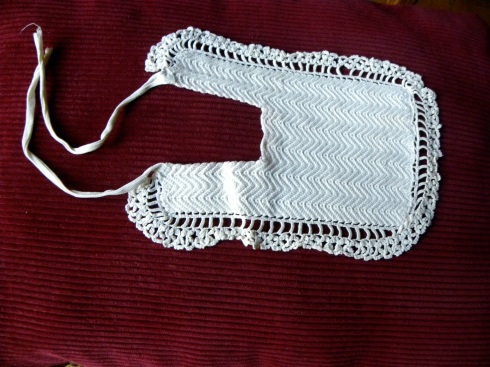
Just as we were busy making modern bibs here, my mum happened to open a box of old linen, and guess what she came across: more bibs!
These are much more delicate, labor-intensive and skillful, just as one would expect of handmade bibs from… when? We are not sure who made them, but they are probably from the early 1900s. My mum thinks they used the one above for her, and she herself may have used some for my older brother, for special occasions.
Honestly, I am glad they were not used on me. Given my – now openly declared – underdeveloped sense of fashion, I am sure that even as a baby I would have been frustrated by all this elaborate and attention-drawing paraphernalia.
Being on the safe side of having to wear one any longer, though, I am only too grateful to have the chance to see the superb craftsmanship of my ancestors, a taste of history, fashion, and love handed down to the next generations.
Thanks mum, for taking and sending these photos!
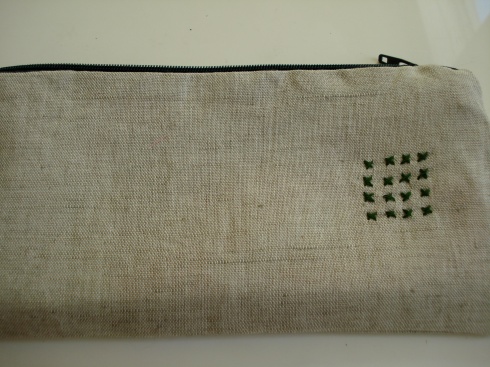
Every now and then I get the urge to embroider something, anything, on anything. This time I satisfied my craving by making simple designs in natural-color linen that I then cut into pieces for making zippered pouches. I ended up making 3, and have already given away 2 of them. I can’t seem to resist giving zippered pouches as gifts, to whoever comes across my radar as potential recipient.
I forgot to take photos of the others before I gave them away, but I enjoyed making them so much I may make the same designs again. I managed to remember this one at least.
On a different note, I rarely talk about clothes here, or in general, because my sense of fashion is rather basic and underdeveloped. I like wearing things that are comfortable, warm, and soft, but am too shy to actually wear them in public, so most days I end up with the unimaginative jeans and t-shirt. I would like to be daring enough to wear either of these 2 outfits, for example.
I have done basic embroidery on and off since I was a child but not so much recently. My fondest memory includes one summer when my mother was making one of the most unique tablecloths I ‘ve ever seen. She made all these incredible cute drawings and was tracing them with vibrant colours. It was lovely, but she never finished it. She ‘s always been a painter more than a needle person. She designed one for my aunt, though, and that one is finished and it’s lovely! (secret question: should I try and finish it myself? tempting…).
While she was working on it, of course I got into it and wanted to do some myself (I can’t remember how old I was, but I had tried needlework before). So my father generously donated his pyjamas, and I drew some shapes on the pocket and sleeve. Sea waves and a sun on the pocket, an odd round shape on the sleeve that was supposed to be a boat’s strirring wheel (we were on summer holidays). I also embroidered his initials on the side. All that very clumsy, of course, and for that reason even more cute! Even though these pyjamas are too worn out for use, I think he still has them!!
The other day, however, I came across a very pleasant book at the library that inspired me to try my hand at embroidery again. So I pulled out my stash of embroidery floss, which I have been saving (and brought from Greece) since highschool. Back then, I used to make these:
After studying the stitches in the book, I made a list (of course) of all the stitches and decided which ones I wanted to practice. I drew some examples on a pad, and that really helped because as I was drawing them I was visualising how the needle would have to work. It was an unexpected help!

I then transferred it on a piece of cloth. I did that just by redrawing it. I guess if I had something harder to redo I ‘d use some of the transferring techniques the book suggests, but this was simple enough.

Stitching over the pencil marks didn’t take long (yes, pencil marks! I didn’t really care whether it washes off or not. Anyway, it does wash off, and my father’s pyjamas will testify to it)

I am almost surprised, and certainly very pleased with the outcome. It was enjoyable, and its slow and deliberate pace is very relaxing and meditative. I will definitely work my way through the book’s stitches in similar small projects and add embroidered embellishments to projects.


